

I went to Ecuador! It was an adventure that put me completely out of my element in many, many ways. It took a week to get used to not disposing of toilet paper into the toilet, three days to fully figure out the long commute to my volunteer work site, two days to become accustomed with showering in weak, lukewarm water (until we ran out of gas), though I never quite got used to the inadvertently racist catcalls and hiking at high altitudes. Despite being somewhat lost and confused in the beginning, it took me no time to dive into the food scene—I was eating things that could have potentially made me sick to my stomach, from day one. There was so much to try and so much cultural exposure that I gained from simply stepping into a restaurant or stall for lunch and talking to the people there. Eating out and buying food to cook in my kitchen was fulfilling, both viscerally and spiritually.

Many times, food came to my rescue. Admittedly, I very rarely know where I am, even in my own hometown. My sense of direction absolutely sucks. So, you can only imagine what things must have been like in Quito for me on my own, with no 3G and no English to be heard or seen. I used my gluttony as a compass. The Spanish school was just past this little stall with the cups of slivered green mango sticks and bagged nuts. Plaza Foch was in the direction of the brightly-lit Union Bakery (a favorite place to grab freshly squeezed orange juice and maracuya gelato). I needed to be facing Texas Chicken (a fried chicken chain store which serves your average pollo with menestra and rice) when exiting the bus stop on the way home. When I was totally disoriented looking for my apartment on my first day off on my own, the faded, familiar-yet-foreign pictures of Chinese dishes plastered to the windows of the downstairs chifa (Chinese restaurant) were what guided me home. The smells of bubble gum told me that I was in the right side street when walking to work after getting off the bus—the daycare center was across the way from Quito’s largest chicle factory.
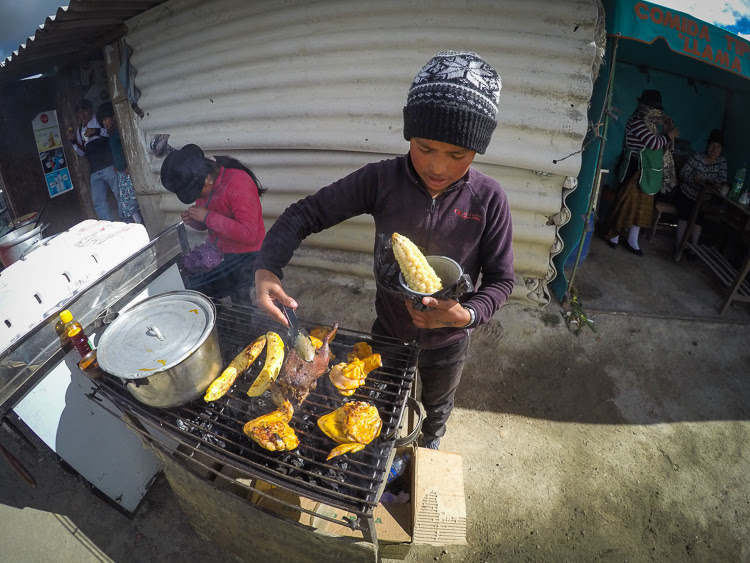

So, after a few nights of eating American food after my long hiatus, I dragged Wes into helping me prep for a big Ecuadorian feast. He not only made a rotisserie chicken (pictured above) just like the ones I had seen spinning in the windows throughout Ecuador, but also accompanied me on my crazed search for achiote spice and tomate de arbol, chopped up a rock-hard yucca root, and assisted with the deep-frying and smashing process of making patacones.

We had my parents over for almuerzo, followed by scratch-made chocolate fondue. I was pleasantly surprised that everyone enjoyed the food, and we had just enough left over for another dinner!


First time buying lots of these ingredients: yucca root, achiote, green plantains, and lentils. It was exciting to try cooking with things that we otherwise may not ever have!
Menestra de Lentejas

Arroz con menestra de lentejas is a traditional Ecuadorian lentil stew simmered with onion, pepper, tomato, garlic, cumin, and cilantro. Menestra is served with rice and some kind of meat – I had it a couple of times in Ecuador, once was with a rotisserie chicken leg, and once was with thin pieces of pan-seared pork. Crappy phone pictures don't do it justice, but here they are:

In Baños, I picked up a five-dollar to-go box of it before leaving to catch our bus ride home. In Quito, Maria the housekeeper at Monika’s place cooked this up for lunch.

Ingredients:
2-3 tbs oil
1 red onion, diced
1 bell pepper, diced
3 tomatoes, diced
6 garlic cloves, minced
2 tsp cumin
1 tsp achiote powder or ground achiote
4 tbs chopped cilantro
~7 cups of water
1 lb lentils, rinsed
Salt to taste

Directions:
1. Heat the oil on medium heat in a large sauce pan or cooking pot.
2. Add the onion, bell pepper, tomato, garlic, cumin, salt, achiote and 2 tablespoons of the cilantro to make a refrito for the stew.
3. Cook, stirring occasionally, until all the ingredients have softened, about 5 minutes.
4. Add the water and increase heat to bring water to boil.
5. Add the lentils and reduce the heat to medium low, cover partially and cook until the lentils are tender. Taste and add salt if needed, stir in the remaining 2 tbs of cilantro, and remove from the heat. (Note: I added garlic powder as well)
Arroz Amarillo

Although all of the rice that I ate in Ecuador was white, I know that they also make yellow rice simply by adding a little achiote (annatto seed) to the pot. When I stayed in the host home, I watched how they would sautee onions and garlic in the pot, and pre-boil extra water in the same pot to compensate for the heightened altitude. The rice went in after that, and then a small metal plate was placed beneath the pot, just above the fire, to distribute the heat. They all laughed when I said that I had no idea how to make rice without an electornic rice cooker, and helped me prepare rice for my mabo tofu, which I made on my last night for all to try.
I actually made my rice too mushy that day – the ratios of water to rice were very different here at sea level versus up in the mountains in Quito. But then I did it again on another day with just white rice, and it turned out correctly!
Ingredients:
2 cups of uncooked long grain rice (sorted and rinsed if needed)
2 tbs oil or butter
2 tbs minced or finely chopped white onions
1 garlic clove, minced
2 ¼ cups water
Salt to taste
Directions:
1. Heat the oil or butter on medium temperature in medium sized saucepan.
2. Add the minced onions and garlic (and achiote if making arroz amarillo or yellow rice), cook until the onions are translucent or soft, about 2 minutes.
3. Add the rice and stir it in so that it is well coated by the oil, add the water and bring it to a boil.
4. Let the water reduce until it barely covers the rice, cover with a lid, reduce the temperature to low, and cook for about 20-25 min.
Curtido de Cebolla y Tomate

So, I really wanted to make aji de tomate de arbol, which is a spicy, orange-ish sauce with red onion. Every table in a restaurant is guaranteed to have a small bowl of this aji with a spoon, which is the equivalent of a saltshaker or the little plastic thing of chili sauce at a Chinese restaurant. We searched in vain for the tomate de arbol, but alas, the fruit that is so abundant in Ecuador was nowhere to be found in Los Angeles. So, I settled on making a simple curtido of pickled onions and tomatoes instead. My mom liked it so much that she replicated it at home for her friends.

Ingredients:
2 small red onions
Juice of 3 limes
1 tablespoon oil (light olive oil or avocado oil)
3 tomatoes
1 tablespoon finely chopped cilantro
1 tablespoon salt + more to adjust taste Instructions
Directions:
1. Cut the onion in half, slice very finely and place in a bowl
2. Sprinkle with 1 tablespoon salt and let rest for about 10 minutes
3. Cover the onions with lukewarm water and let rest for another 10 minutes
4. Rinse and drain the onions
5. Add the lime juice and a sprinkle of salt, let rest until the onions start to turn pinkish or until about 30 minutes before serving
6. Cut the tomatoes in half and slice very finely
7. Mix the onions with the sliced tomatoes, oil, and cilantro. Taste and add salt if necessary.
Note: I didn’t use any oil and it was great.
Patacones (or Tostones)

These are thick, twice-fried pucks made of green plantains. Thankfully, we were able to find plenty of green plantains in the Mexican supermarket in LA. Monika had bushels of them in the back area of her house, since they consume them so much. I had plantains in every form that you could imagine in Ecuador – shaped into a tightly packed sphere and stuffed with pork, thinly sliced and fried in long strips, stirred into stews, and more. Patacones are made by frying thick-cut pieces of plantain in hot oil, removing and smashing them, and then re-frying them. You typically get one or two of them on the edge of your plate with whatever you ordered. Monika made them at home and taught me how!

Ingredients
2 green plantains, use about 1 plantain per person for an appetizer and 1 plantain per 2 people for a side dish – you can get about 4-5 patacones per plantain
Oil for frying, use an oil that won’t burn at high temperatures (peanut oil or avocado oil)
Salt to taste

I think next time I should cut them less diagonal and more straight-across, because they should be more round after being mashed.


Directions:
1. Peel the plantains, the easiest way to peel a green plantain is to make the lengthwise cut on one of the angles, the cut should be skin deep without touching the actual flesh of the plantain, then use the knife to raise the skin and peel it off.
2. Cut the plantains into thick slices, you can make straight cuts or slightly diagonal cuts.
3. Heat the canola oil over medium high heat in a frying pan – use enough oil to almost cover the plantain slices - or a deep fryer, temperature should be about 350 F, fry the plantains until they start to get yellow, but not golden.
4. Remove the plantains and place on paper towels to drain the oil.
5. Use the bottom of a glass (or small bowl or a wood pestle) to smash and flatten the plantains, do this gently to keep the slices from breaking, a few cracks is ok as long as the whole slice remains in one piece. It is best to do this when they are still warm.
Monika’s tip: Flash-soak them in hot water for about 30 seconds.
6. Sprinkle the plantain slices with salt and other seasonings (if using the raw garlic rub it on the slices).
7. Reheat the oil, temperature should be about 375 F and fry the plantains until golden on each side, about 1-2 minutes per side.
8. Remove from the oil, drain again on paper towels, and add additional seasoning if needed.
Chimichurri Roasted Chicken

I found this recipe on Laylita’s blog and since Wes has rotisseried chickens before, he volunteered to try this out. It was delicious – especially that chimichurri butter. We saved some of the butter and ended up using it with baked potatoes on another night later in the week – it was to die for!
Chimichurri Butter

1 cup of butter, 2 sticks or 8 ounces, room temperature
1 bunch of parsley, leaves only
5-6 sprigs of fresh oregano, use leaves only
A handful of fresh basil leaves
6-8 garlic cloves, crushed
4-5 green onions or scallion stalks
1-2 teaspoons of chili pepper flakes or 1 small red hot pepper, seeded and deveined, diced
3-4 tablespoons red wine vinegar
1 tablespoon fresh lime or lemon juice
Salt and pepper to taste
To bake with the chicken:
Onions, potatoes or your choice of veggies


1. Place all the ingredients expect for the butter in a small food processor and pulse until the herbs are finely chopped.
2. Add the butter and continue pulsing until you have smooth creamy mix. Can be made ahead of time, but should be brought back to room temperature before using to prepare the roasted chicken.
Rotisserie / Roasted Chicken


For roasting or baking the whole chicken:
1. Wes brined the chicken the day before in salt water, but not necessary.
2. Rub about half of the butter chimichurri all over chicken, including under the skin. Save the rest of the chimichurri butter for basting and for serving.
3. Rotisserie the chicken for 1.5-2 hours, basting the chicken with the chimichurri butter about every 15 minutes, until the internal temperature of the chicken was 165F.
Oven method:
1. Pre-heat oven to 425F
2. Place the vegetables (onions, potatoes, etc) under chicken in baking or roasting pan.
3. Bake the chicken (uncovered) at 425F for 30 minutes
4. Lower heat to 400F, baste chicken and bake for another 50-60 minutes, basting every 15-20 minutes.
5. During the last 5-10 minutes, add additional chimichurri butter or chimichurri sauce on top.

I also made a simple soup using yucca roots, spinach, carrot, onion, oregano, and cilantro, in chicken broth. It isn’t almuerzo without sopa! Every typical lunch combination comes with first a hearty bowl of soup, usually with some kind of tuber in it, followed by the main dish. Serving lunch without soup and juice would be like having a burger without fries in the U.S. The soup was nothing special, and I didn’t use any recipe, but it was really fun to deal with yucca for the first time. It sure was a stubborn old root!

¡Voilá! Una comida Ecuatoriana completa.

We also had chocolate fondue afterward, which I showed everyone how to make using raw cacao beans that I had smuggled back across the border. Monika made this with us volunteers at her house and I recorded every step using my phone, hoping that I’d be able to replicate it back home. That night was my last night in Ecuador, and the fondue was as bittersweet as my mood. When we ate it again, it took me straight back to Quito.

This time, rather than pineapples and bananas, we had it with plump strawberries. Rather than grinding it with an old fashioned hand crank, we chopped the beans with an electric food processor. Rather than heating it up on the stove, we used an induction cooker (the one that we use for hotpot). Rather than milk powder, we used evaporated milk. Despite all of the modernized changes, the fondue tasted exactly the same – you can’t change the taste of these beans.

Monika’s family grows the cacao fruit, and they give her the “beans,” which are the seeds. She was so generous to share the rest of her stash with me on my last day. I made sure to do these precious beans justice!

Ingredients:
1 cup of cacao beans
¼ cup of evaporated milk
¼ cup of cane sugar
1 cinnamon stick
1 tablespoon of vanilla extract


Directions:
1. Toast the cacao beans in a pan on medium heat. Keep stirring them with a wooden spoon to keep them from burning.
2. After about 10 minutes, when the beans begin to make popping sounds, remove them from heat and peel them with your fingertips. They’ll be very hot to the touch, but it’s easier to peel while they are still warm.
3. Grind the beans as finely as possible. We weren’t able to get them too smooth in either Monika’s house or our apartment, but nobody minds a gritty fondue so long as it tastes AMAZING!
4. On medium heat, mix the grounds with about 2 cups of hot water, evaporated milk, cinnamon stick, and vanilla extract, stirring constantly, for a while – maybe 10 minutes or more – until it begins to thicken. Note: Monika likes to grate orange zest into it, and when we did it at her place, we threw in a piece of ginger!
5. Remove from heat and allow the fondue to thicken a bit more. Serve warm with fruit and skewers!

Also, I wanted to note that Wes pulled an amazing While You Were Out stunt out of his back pocket while I was gone in Ecuador (anybody know that old HGTV show?). Nobody (not even himself) knew that he had the carpentry, joinery, flatworking, and finishing skills to pull this thing off. The last thing that I saw before leaving was that he had carted home a terrifying miter saw and an equally formidable table saw. I knew that he had a plan, but neither of us knew what he would end up making. With Internet being so bad over in Ecuador, I couldn’t really keep updated on his posts online, but this is what I came home to:

I grew up with my dad making all kinds of furniture for our home, so this just warmed my heart. Also, not only is it super functional (wheels on the ends, benches that fit perfectly underneath to save space), but also a representation of everything that I like about Wes. Detail-oriented, methodical, creative, and sharp. We’ve already had every meal out here because of it, be it Vons sushi rolls or soy sauce chicken drumsticks. He also made the beautiful end-grain cutting board under that picture of the chimichurri butter up there!

I’m hoping to return to Ecuador as soon as we can, so that Wes can try everything in person and meet everyone. For now, I’m just really thankful for Laylita’s blog, to which I attribute every recipe to (except Monika's fondue), for all the Ecuadorian recipes that I am excited to make!
No comments:
Post a Comment